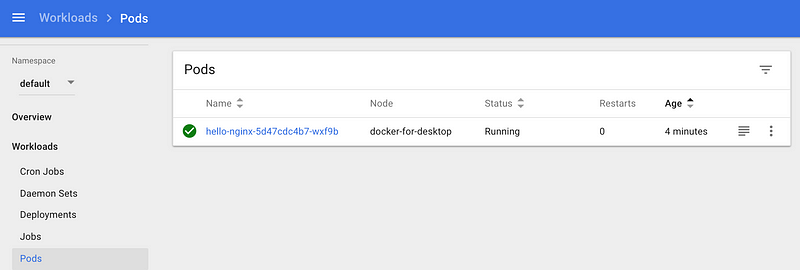
If we visit the Replica Sets now, we can see it:

Click on the Replica Set name and it will show the Pod details as given below:

Alternately, you can also get to the Pods via the Pods link in the Workloads as shown below:

Click on the Pod and you can get various details on it as given below:

You can see that it has been given some default labels. You can see its IP address. It is part of the node named docker-for-desktop.
There are some interesting links that you will find on this page as shown below, via which you can directly EXEC into the pods or see the logs too.

We could have got the Node and Pod details via a variety of kubectl describe node/pod commands and we can still do that. An example of that is shown below:
$ kubectl get pods
NAME                         READY STATUS  RESTARTS AGE
hello-nginx-5d47cdc4b7-wxf9b 1/1   Running 0        10m
$ kubectl describe pod hello-nginx-5d47cdc4b7-wxf9b
Name: hello-nginx-5d47cdc4b7-wxf9b
Namespace: default
Node: docker-for-desktop/192.168.65.3
Start Time: Wed, 10 Jan 2018 18:10:35 +0530
Labels: pod-template-hash=1803787063
run=hello-nginx
Annotations: kubernetes.io/created-by={“kind”:”SerializedReference”,”apiVersion”:”v1",”reference”:{“kind”:”ReplicaSet”,”namespace”:”default”,”name”:”hello-nginx-5d47cdc4b7",”uid”:”7415cff7-f603–11e7–9f7b-025000000…
Status: Running
IP: 10.1.0.7
Created By: ReplicaSet/hello-nginx-5d47cdc4b7
Controlled By: ReplicaSet/hello-nginx-5d47cdc4b7
Containers:
hello-nginx:
Container ID: docker://a0c3309b61be4473bf6924ea2be9795de660f49bda36492785f94627690cbdae
Image: nginx
Image ID: docker-pullable://nginx@sha256:285b49d42c703fdf257d1e2422765c4ba9d3e37768d6ea83d7fe2043dad6e63d
Port: 80/TCP
State: Running
...// REST OF THE OUTPUT
Expose a Service
It is time now to expose our basic Nginx deployment as a service. We can use the command shown below:
$ kubectl get deployments
NAME        DESIRED CURRENT UP-TO-DATE AVAILABLE AGE
hello-nginx 1       1       1          1         19m
$ kubectl expose deployment hello-nginx --type=NodePort
service “hello-nginx” exposed
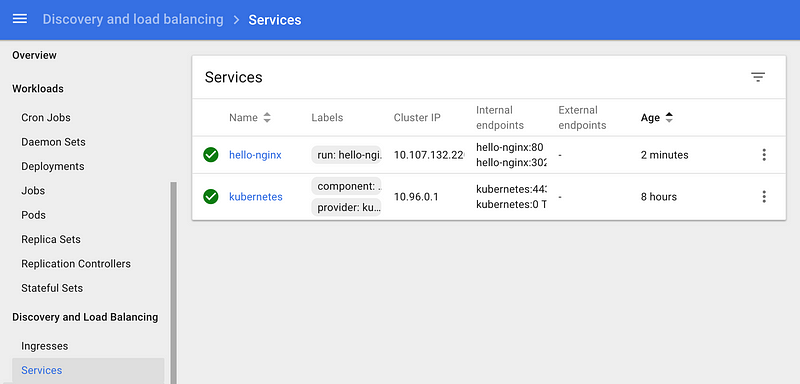
If we visit the Dashboard at this point and go to the Services section, we can see out hello-nginx service entry.

Alternately, we can use kubectl too, to check it out:
$ kubectl get services
NAME        TYPE      CLUSTER-IP     EXTERNAL-IP PORT(S)      AGE
hello-nginx NodePort  10.107.132.220 <none>      80:30259/TCP 1m
kubernetes  ClusterIP 10.96.0.1      <none>      443/TCP      8h
and
$ kubectl describe service hello-nginx
Name: hello-nginx
Namespace: default
Labels: run=hello-nginx
Annotations: <none>
Selector: run=hello-nginx
Type: NodePort
IP: 10.107.132.220
Port: <unset> 80/TCP
TargetPort: 80/TCP
NodePort: <unset> 30259/TCP
Endpoints: 10.1.0.7:80
Session Affinity: None
External Traffic Policy: Cluster
Events: <none>
Scaling the Service
OK, I am not yet done!
When we created the deployment, we did not mention about the number of instances for our service. So we just had one Pod that was provisioned on the single node.
Let us go and see how we can scale this via the scale command. We want to scale it to 3 Pods.
$ kubectl scale --replicas=3 deployment/hello-nginx
deployment "hello-nginx" scaled
We can see the status of the deployment in a while:
$ kubectl get deployment
NAME        DESIRED CURRENT UP-TO-DATE AVAILABLE AGE
hello-nginx 3       3       3          3         45m
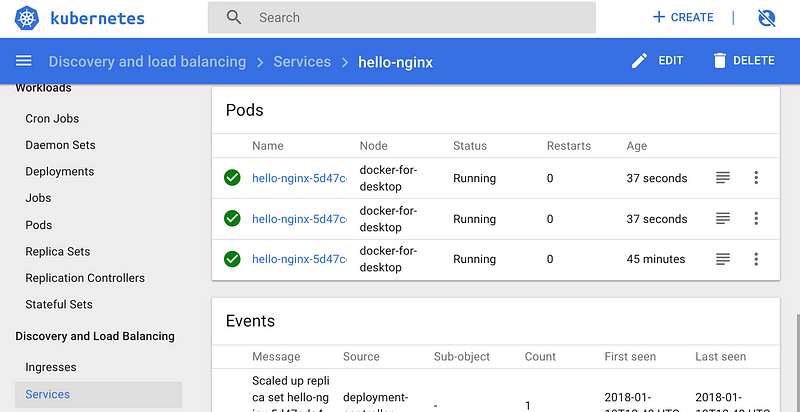
Now, if we visit the Dashboard for our Deployment:

We have the 3/3 Pods available. Similarly, we can see our Service or Pods.

Conclusion
Hope this blog post gets you started with Kubernetes with Docker for Mac. Please let me know about your experience in the comments. Now go forth and play the role of a helmsman.
No comments:
Post a Comment