Friday, 25 November 2016

Most Frequently Used UNIX / Linux Commands (With Examples)

1. tar command examples

Create a new tar archive.
$ tar cvf archive_name.tar dirname/
Extract from an existing tar archive.
$ tar xvf archive_name.tar
View an existing tar archive.
$ tar tvf archive_name.tar

Sunday, 13 November 2016

Jenkins - Remote Testing


Web tests such as selenium tests can be run on remote slave machines via the master slave and selenium suite plugin installation. The following steps show how to run remote tests using this configuration.
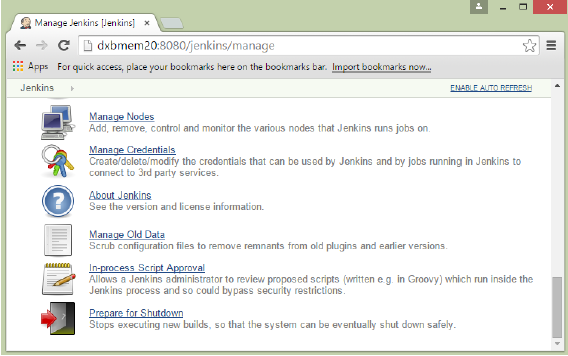
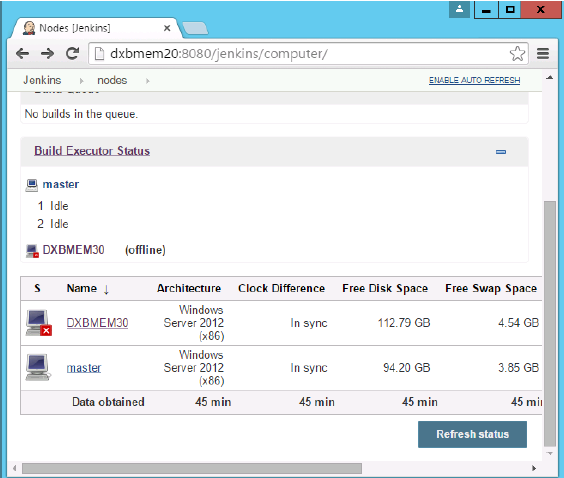
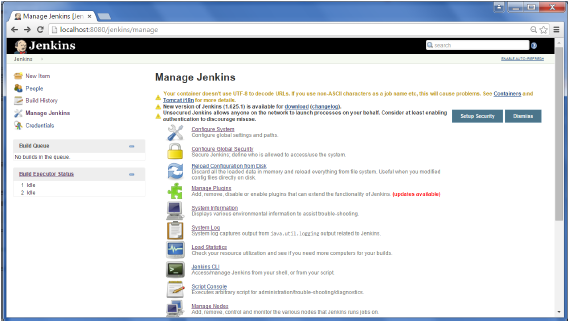
Step 1 − Ensuring your master slave configuration is in place. Got to your master Jenkins server. Go to Manage Jenkins → Manage Nodes.
Jenkins Remote Testing
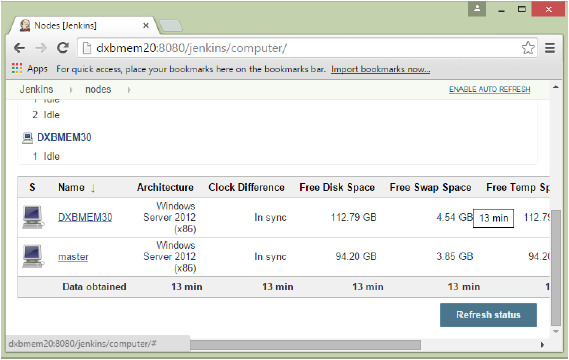
In our node list, the DXBMEM30 label is the slave machine. In this example, both the master and slave machines are windows machines.
Node List
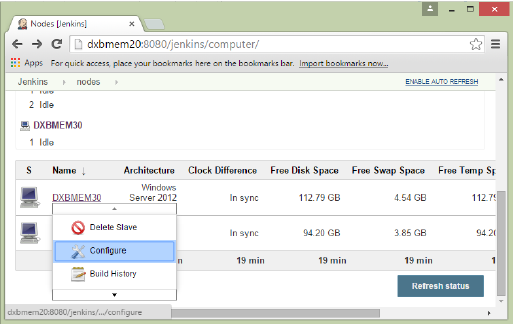
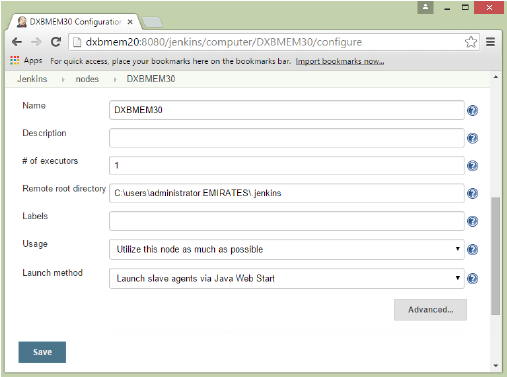
Step 2 − Click on configure for the DXBMEM30 slave machine.
Configure Slave Machine
Step 3 − Ensure the launch method is put as ‘Launch slave agents via Java Web Start’
Launch Slave Agents
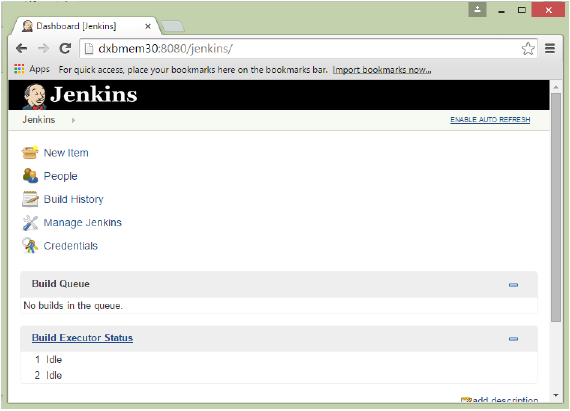
Step 4 − Now go to your slave machine and from there, open a browser instance to your Jenkins master instance. Then go to Manage Jenkins → Manage Nodes. Go to DXBMEM30 and click on
Remote Testing Manage Nodes
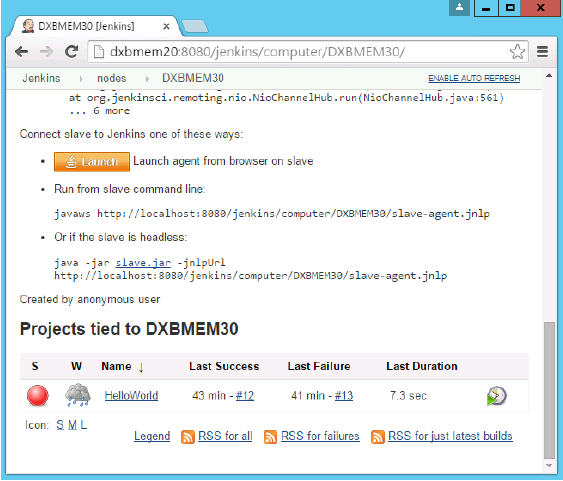
Step 5 − Click on the DXBMEM30 instance.
DXBMEM30 Instance
Step 6 − Scroll down and you will see the Launch option which is the option to Start ‘Java Web Start’
Java Web Start
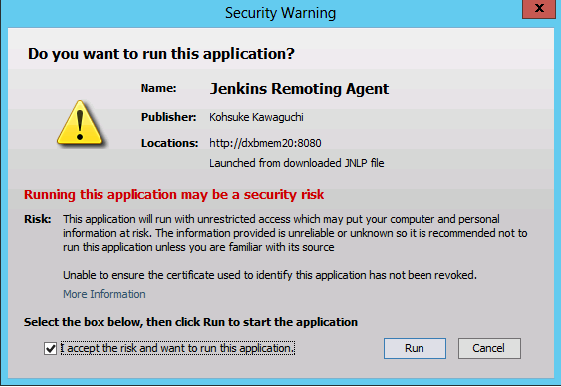
Step 7 − You will be presented with a Security Warning. Click on the Acceptance checkbox and click on run.
Security Warning
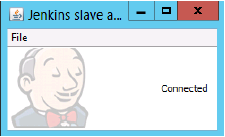
You will now see a Jenkins Slave window opened and now connected.
Jenkins Slave Window Connected
Step 8 − Configuring your tests to run on the slave. Here, you have to ensure that the job being created is meant specifically to only run the selenium tests.
In the job configuration, ensure the option ‘Restrict where this project can be run’ is selected and in the Label expression put the name of the slave node.
Configuration
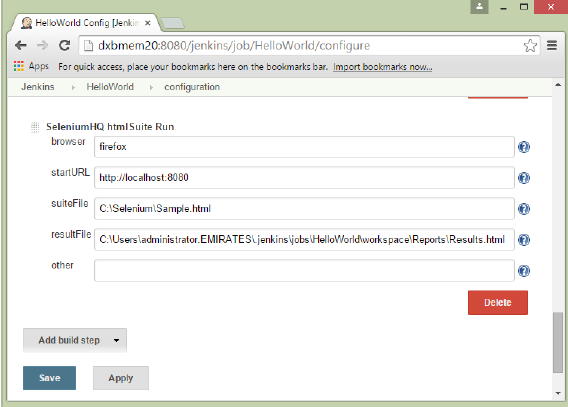
Step 9 − Ensure the selenium part of your job is configured. You have to ensure that the Sample.html file and the selenium-server.jar file is also present on the slave machine.
Configure Selenium
Once you have followed all of the above steps, and click on Build, this project will run the Selenium test on the slave machine as expected.

Jenkins - Backup Plugin


Jenkins has a backup plugin which can used to backup critical configuration settings related to Jenkins. Follow the steps given below to have a backup in place.
Step 1 − Click on Manage Jenkins and choose the ‘Manage Plugins’ option.
Manage Backup Plugin
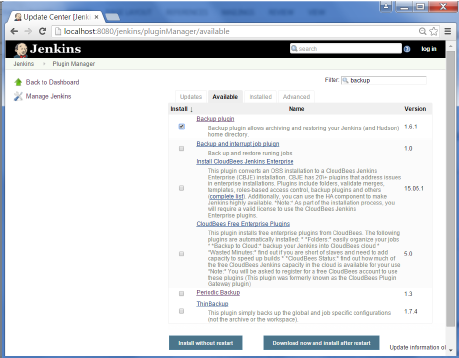
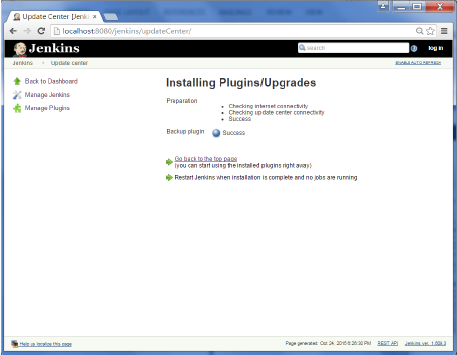
Step 2 − In the available tab, search for ‘Backup Plugin’. Click On Install without Restart. Once done, restart the Jenkins instance
Backup Plugin1Backup Plugin2
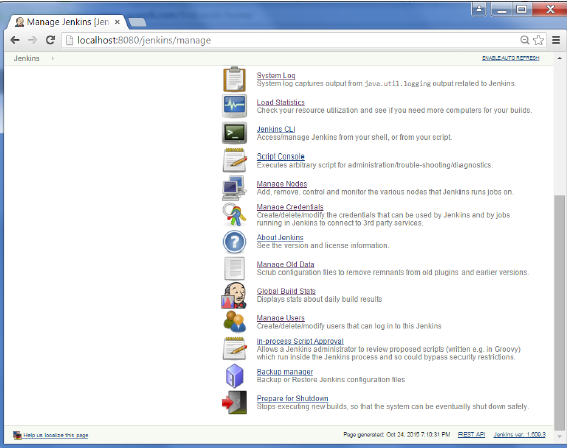
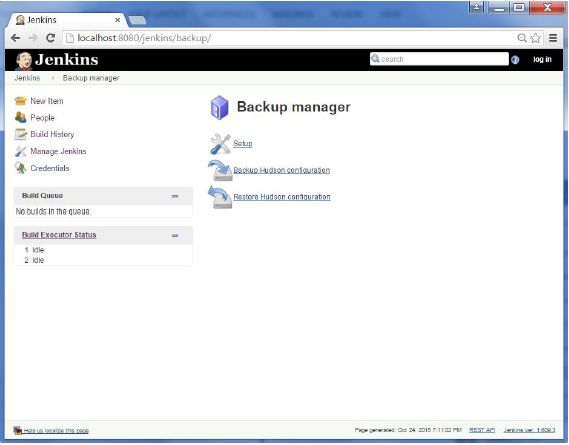
Step 3 − Now when you go to Manage Jenkins, and scroll down you will see ‘Backup Manager’ as an option. Click on this option.
Backup Manager
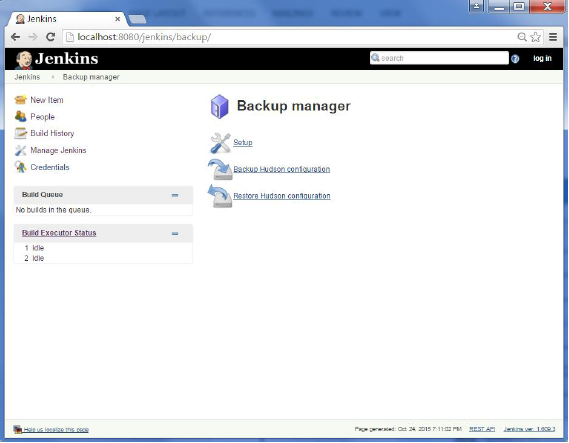
Step 4 − Click on Setup.
Backup Manager Setup
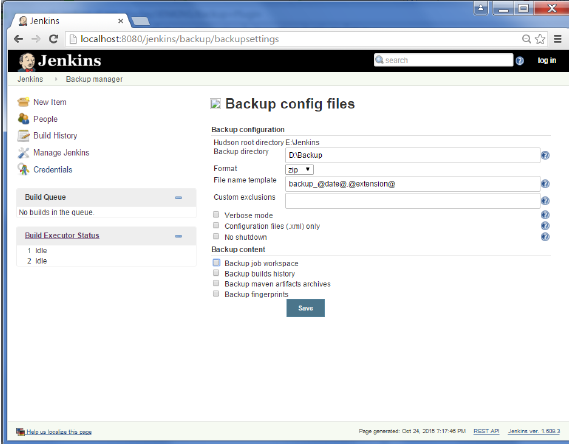
Step 5 − Here, the main field to define is the directory for your backup. Ensure it’s on another drive which is different from the drive where your Jenkins instance is setup. Click on the Save button.
Backup Config Files
Step 6 − Click on the ‘Backup Hudson configuration’ from the Backup manager screen to initiate the backup.
Backup Hudson Configuration
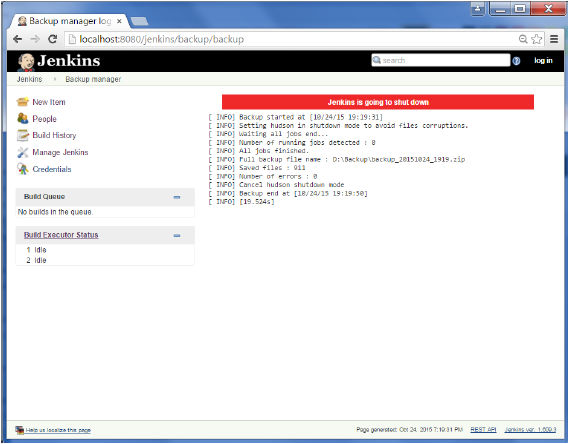
The next screen will show the status of the backup
Backup Status
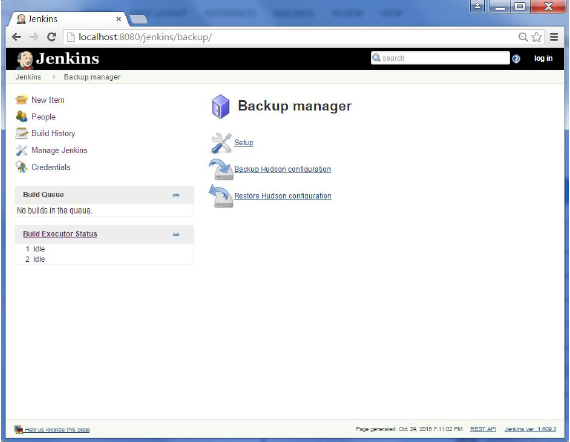
To recover from a backup, go to the Backup Manager screen, click on Restore Hudson configuration.
Restore Hudson Configuration
The list of backup’s will be shown, click on the appropriate one to click on Launch Restore to begin the restoration of the backup.

Jenkins - Security


In Jenkins you have the ability to setup users and their relevant permissions on the Jenkins instance. By default you will not want everyone to be able to define jobs or other administrative tasks in Jenkins. So Jenkins has the ability to have a security configuration in place.
To configure Security in Jenkins, follow the steps given below.
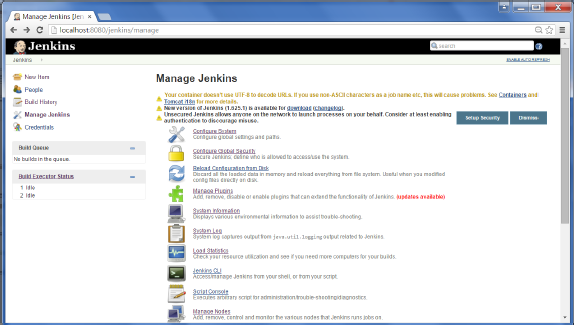
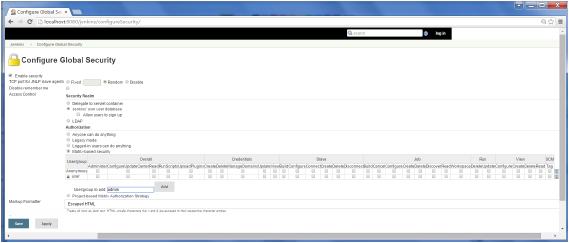
Step 1 − Click on Manage Jenkins and choose the ‘Configure Global Security’ option.
Configure Global Security
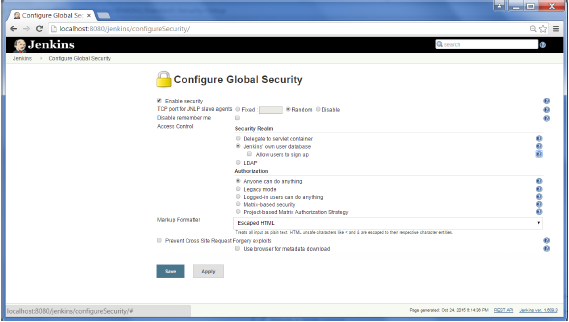
Step 2 − Click on Enable Security option. As an example, let’s assume that we want Jenkins to maintain it’s own database of users, so in the Security Realm, choose the option of ‘Jenkins’ own user database’.
By default you would want a central administrator to define users in the system, hence ensure the ‘Allow users to sign up’ option is unselected. You can leave the rest as it is for now and click the Save button.
Enable Security Option
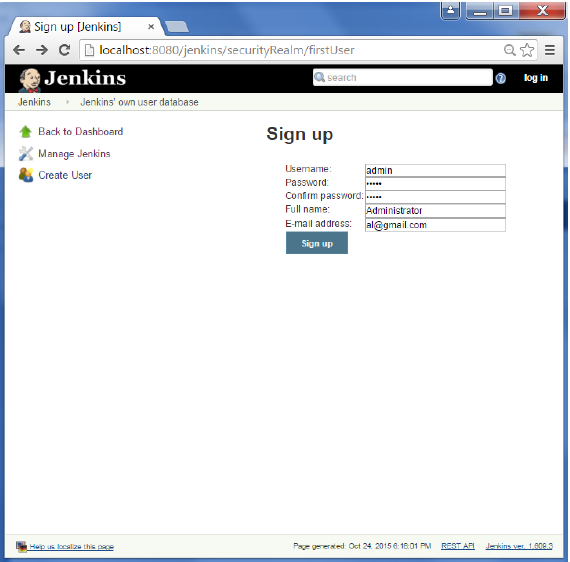
Step 3 − You will be prompted to add your first user. As an example, we are setting up an admin users for the system.
Admin User
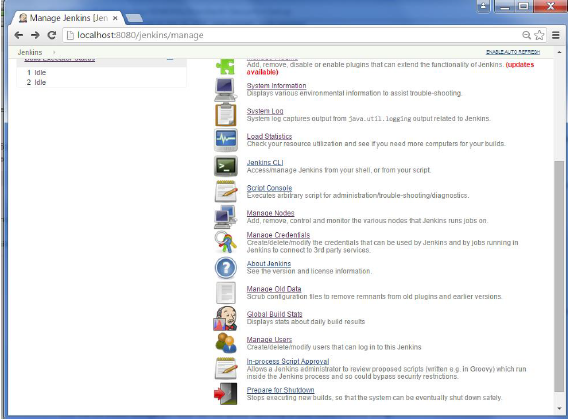
Step 4 − It’s now time to setup your users in the system. Now when you go to Manage Jenkins, and scroll down, you will see a ‘Manage Users’ option. Click this option.
Manage User
Step 5 − Just like you defined your admin user, start creating other users for the system. As an example, we are just creating another user called ‘user’.
User
Step 6 − Now it’s time to setup your authorizations, basically who has access to what. Go to Manage Jenkins → Configure Global Security.
Now in the Authorization section, click on ‘Matrix based security’
Authorization Section
Step 7 − If you don’t see the user in the user group list, enter the user name and add it to the list. Then give the appropriate permissions to the user.
Click on the Save button once you have defined the relevant authorizations.
Your Jenkins security is now setup.
Note − For Windows AD authentication, one has to add the Active Directory plugin to Jenkins.

Jenkins - Managing Plugins


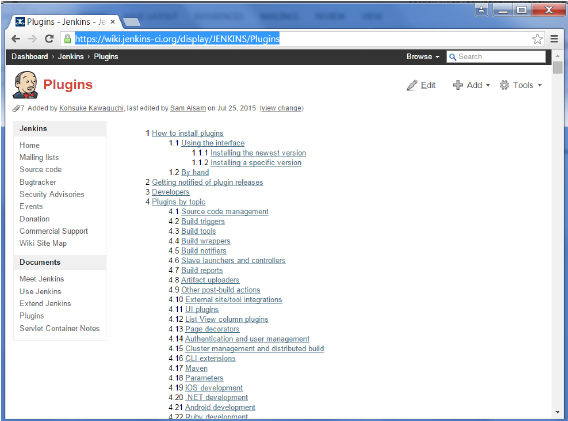
To get the list of all plugins available within Jenkins, one can visit the link − https://wiki.jenkins-ci.org/display/JENKINS/Plugins
Jenkins Managing Plugins
We’ve already seen many instances for installing plugins, let’s look at some other maintenance tasks with regards to plugins

Uninstalling Plugins

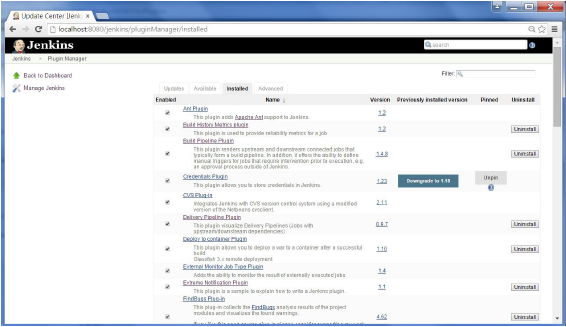
To uninstall a plugin, Go to Manage Jenkins → Manage plugins. Click on the Installed tab. Some of the plugins will have the Uninstall option. You can click these buttons to uninstall the plugins. Ensure to restart your Jenkins instance after the uninstallation.
Uninstalling Plugins

Installing another Version of a Plugin

Sometimes it may be required to install an older version of a plugin, in such a case, you can download the plugin from the relevant plugin page on the Jenkins web site. You can then use the Upload option to upload the plugin manually.


Jenkins - Continuous Deployment


Jenkins provides good support for providing continuous deployment and delivery. If you look at the flow of any software development through deployment, it will be as shown below.
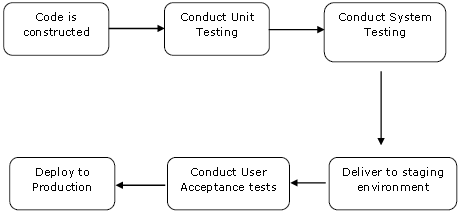
Jenkins Continuous Deployment
The main part of Continuous deployment is to ensure that the entire process which is shown above is automated. Jenkins achieves all of this via various plugins, one of them being the “Deploy to container Plugin” which was seen in the earlier lessons.
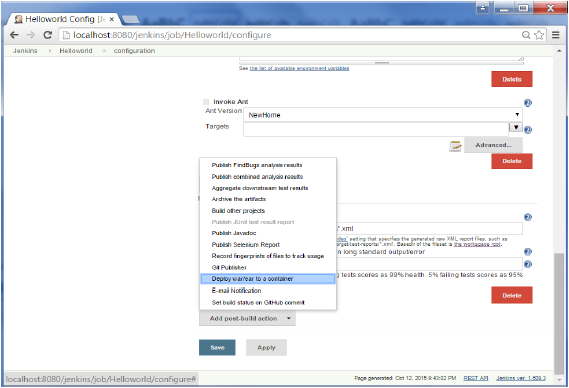
Continuous Deployment Container Plugin
There are plugins available which can actually give you a graphical representation of the Continuous deployment process. But first lets create another project in Jenkins, so that we can see best how this works.
Let’s create a simple project which emulates the QA stage, and does a test of the Helloworld application.
Step 1 − Go to the Jenkins dashboard and click on New Item. Choose a ‘Freestyle project’ and enter the project name as ‘QA’. Click on the Ok button to create the project.
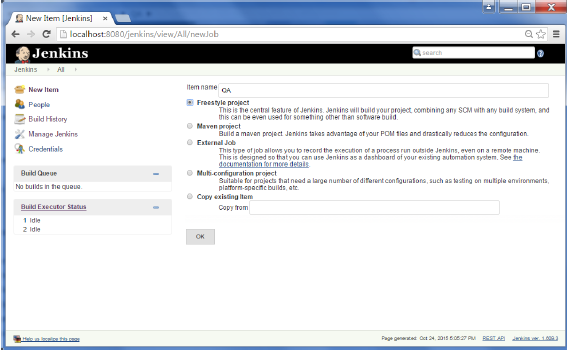
Freestyle Project
Step 2 − In this example, we are keeping it simple and just using this project to execute a test program for the Helloworld application.
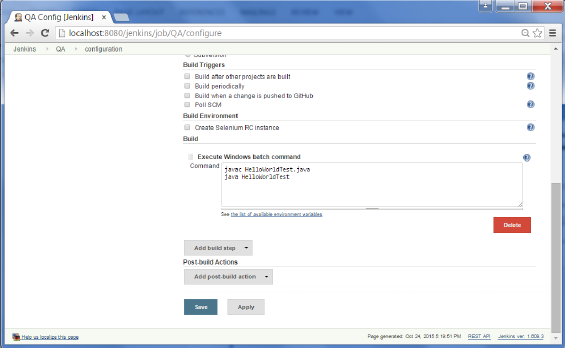
Helloworld Application
So our project QA is now setup. You can do a build to see if it builds properly.
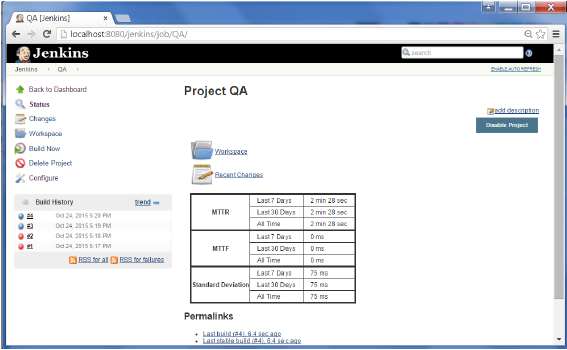
QA Project Build
Step 3 − Now go to you Helloworld project and click on the Configure option
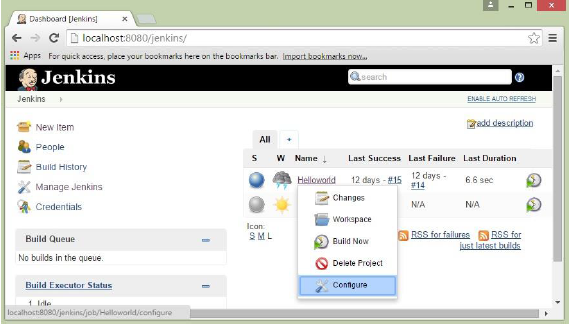
Project Configure Option
Step 4 − In the project configuration, choose the ‘Add post-build action’ and choose ‘Build other projects’
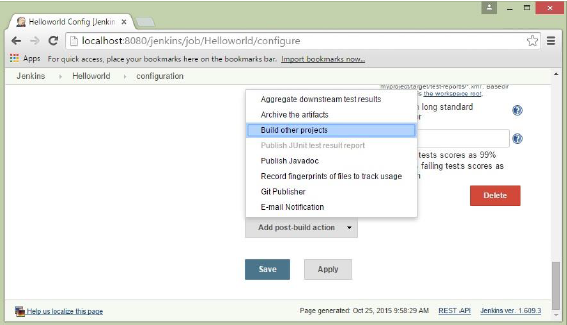
Add Post Build Action
Step 5 − In the ‘Project to build’ section, enter QA as the project name to build. You can leave the option as default of ‘Trigger only if build is stable’. Click on the Save button.
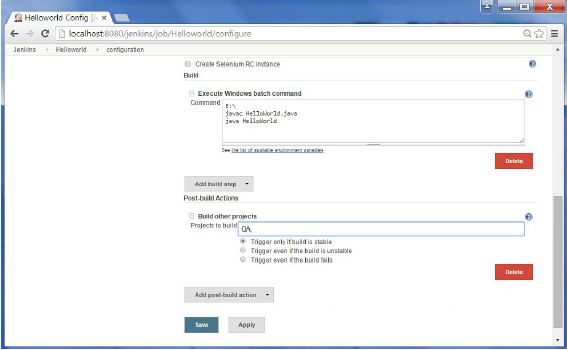
Trigger Stable Build
Step 6 − Build the Helloworld project. Now if you see the Console output, you will also see that after the Helloworld project is successfully built, the build of the QA project will also happen.
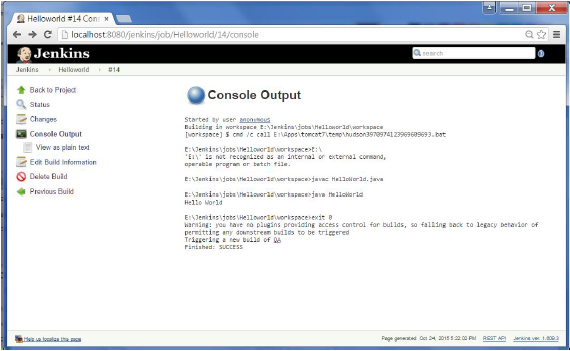
QA Project Console Project
Step 7 − Let now install the Delivery pipeline plugin. Go to Manage Jenkins → Manage Plugin’s. In the available tab, search for ‘Delivery Pipeline Plugin’. Click On Install without Restart. Once done, restart the Jenkins instance.
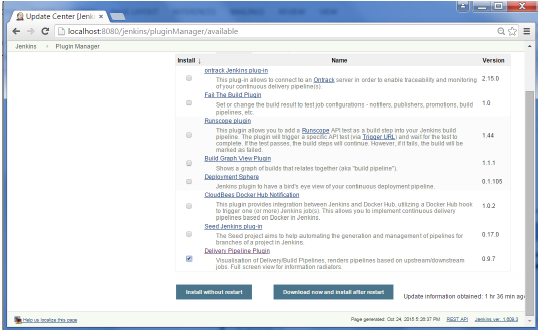
Restart Jenkins Instance
Step 8 − To see the Delivery pipeline in action, in the Jenkins Dashboard, click on the + symbol in the Tab next to the ‘All’ Tab.
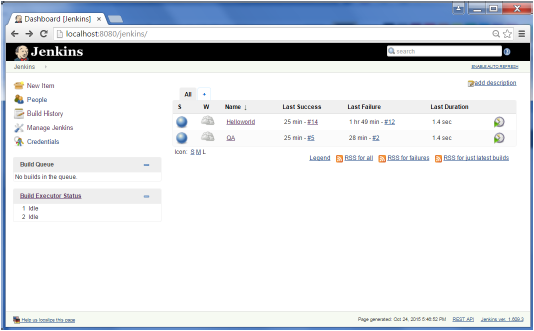
Delivery Pipeline
Step 9 − Enter any name for the View name and choose the option ‘Delivery Pipeline View’.
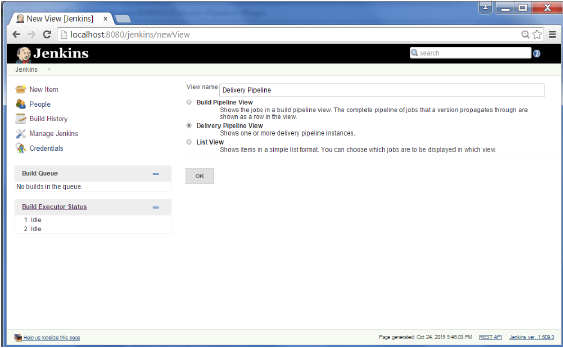
Delivery Pipeline View
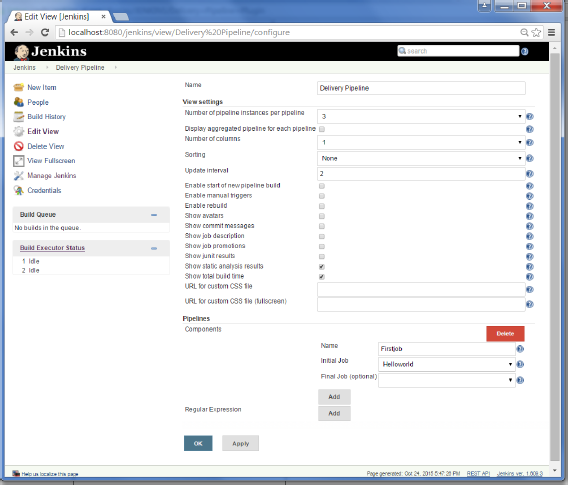
Step 10 − In the next screen, you can leave the default options. One can change the following settings −
  • Ensure the option ‘Show static analysis results’ is checked.
  • Ensure the option ‘Show total build time’ is checked.
  • For the Initial job – Enter the Helloworld project as the first job which should build.
  • Enter any name for the Pipeline
  • Click the OK button.
Change Setting
You will now see a great view of the entire delivery pipeline and you will be able to see the status of each project in the entire pipeline.
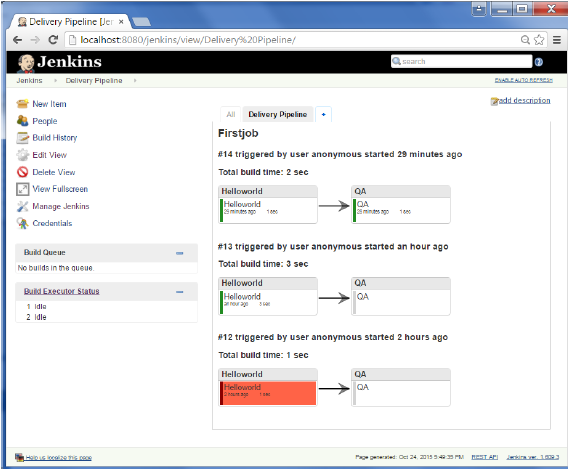
Each Project Status
Another famous plugin is the build pipeline plugin. Let’s take a look at this.
Step 1 − Go to Manage Jenkins → Manage Plugin’s. In the available tab, search for ‘Build Pipeline Plugin’. Click On Install without Restart. Once done, restart the Jenkins instance.
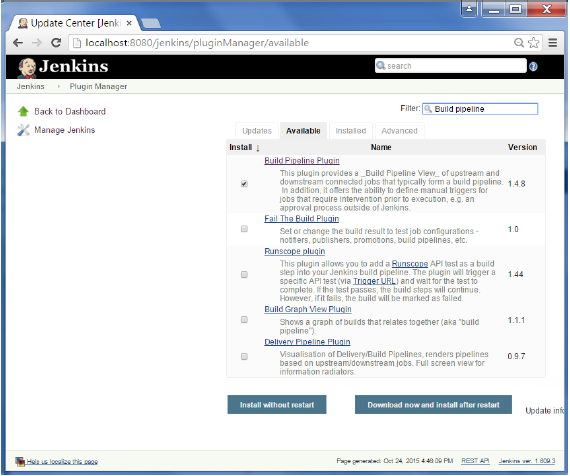
Build Pipeline Plugin
Step 2 − To see the Build pipeline in action, in the Jenkins Dashboard, click on the + symbol in the Tab next to the ‘All’ Tab.
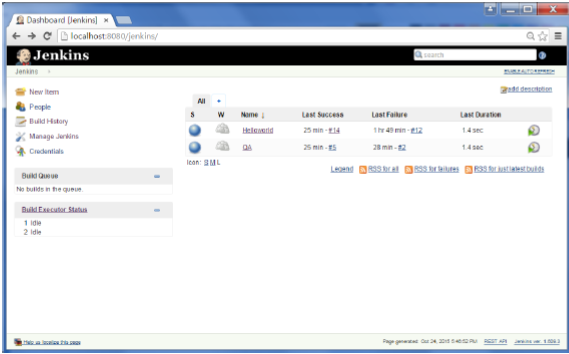
See Build Pipeline Action
Step 3 − Enter any name for the View name and choose the option ‘Build Pipeline View’.
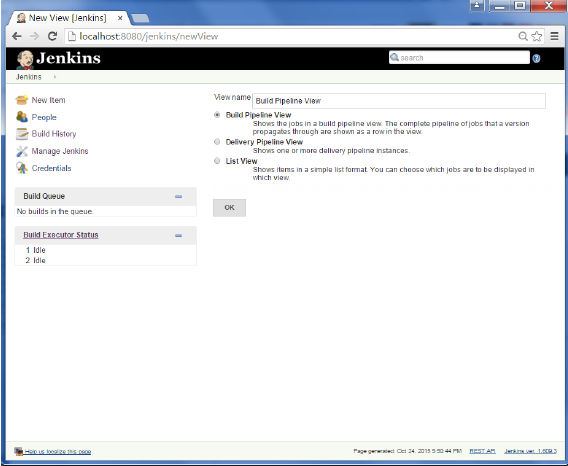
Build Pipeline View
Step 4 − Accept the default settings, just in the Selected Initial job, ensure to enter the name of the Helloworld project. Click on the Ok button.
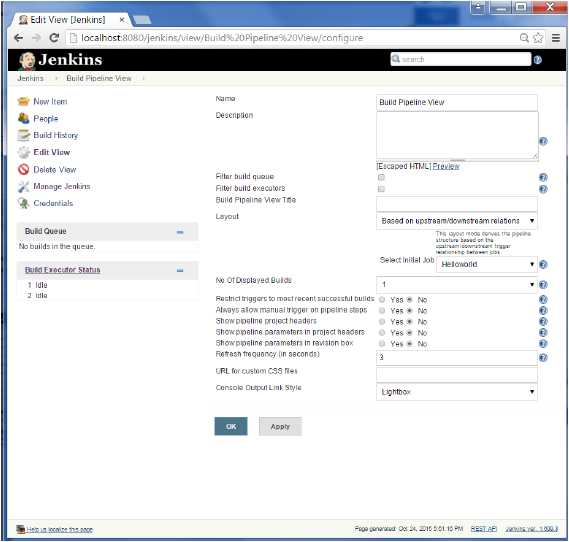
Accept Default Settings
You will now see a great view of the entire delivery pipeline and you will be able to see the status of each project in the entire pipeline.
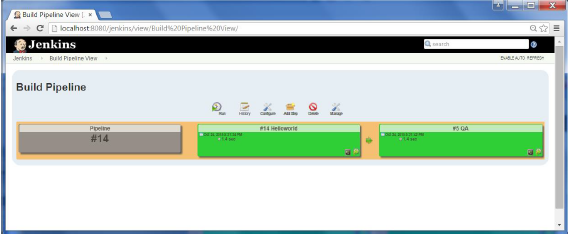
Entire Pipeline Status

Jenkins - Server Maintenance


The following are some of the basic activities you will carry out, some of which are best practices for Jenkins server maintenance

URL Options

The following commands when appended to the Jenkins instance URL will carry out the relevant actions on the Jenkins instance.
http://localhost:8080/jenkins/exit − shutdown jenkins
http://localhost:8080/jenkins/restart − restart jenkins
http://localhost:8080/jenkins/reload − to reload the configuration

Backup Jenkins Home

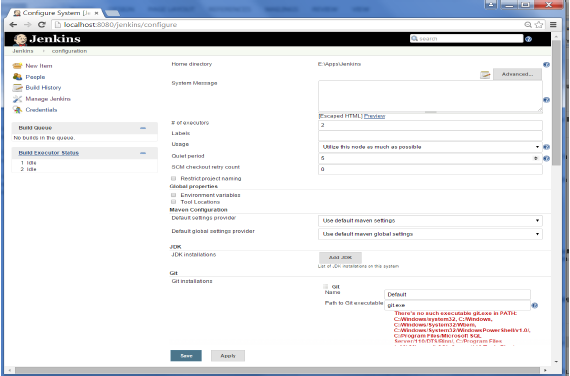
The Jenkins Home directory is nothing but the location on your drive where Jenkins stores all information for the jobs, builds etc. The location of your home directory can be seen when you click on Manage Jenkins → Configure system.
Backup Jenkins Home
Set up Jenkins on the partition that has the most free disk-space – Since Jenkins would be taking source code for the various jobs defined and doing continuous builds, always ensure that Jenkins is setup on a drive that has enough hard disk space. If you hard disk runs out of space, then all builds on the Jenkins instance will start failing.
Another best practice is to write cron jobs or maintenance tasks that can carry out clean-up operations to avoid the disk where Jenkins is setup from becoming full.

Ansible: Roles

Use Ansible roles to orchestrate more complex configurations.Let's create a new directory named  nginx , which will be a Role. Then we&...