Monday, 5 February 2018

Kubernetes with Docker on Mac


Getting Started with Kubernetes on your Windows laptop with Minikube but this time with a Mac machine. The other big difference here is that this is not with Minikube, which you can still 


install on a Mac. It is with a Edge version of Docker on Mac.


We shall cover the following in this post:
  • Installing Docker on Mac Edge version
  • Go through the basic Kubernetes commands to validate our environment.
This tutorial assumes that you know about Docker and Kubernetes in general. To quote from my previous article, I do not want to spend time explaining about what Kubernetes is and its building blocks like Pods, Replication Controllers, Services, Deployments and more. There are multiple articles on that and I suggest that you go through it.
I have written a couple of other articles that go through a high level overview of Kubernetes:
It is important that you go through some basic material on its concepts, so that we can directly get down into its commands.

Docker for Mac installation


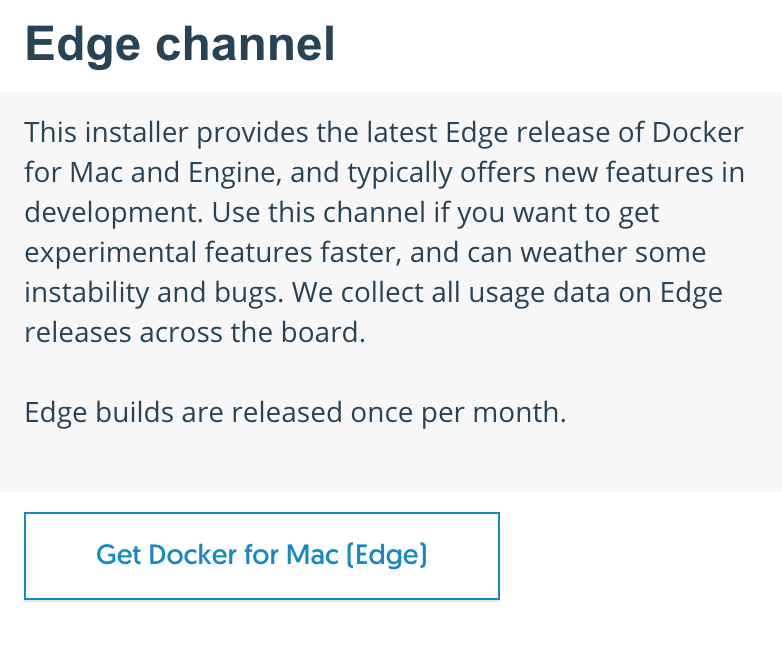
As per the official documentationKubernetes is only available in Docker for Mac 17.12 CE Edge. Go to the official download page and click on the Edge channel and not the Stable version.

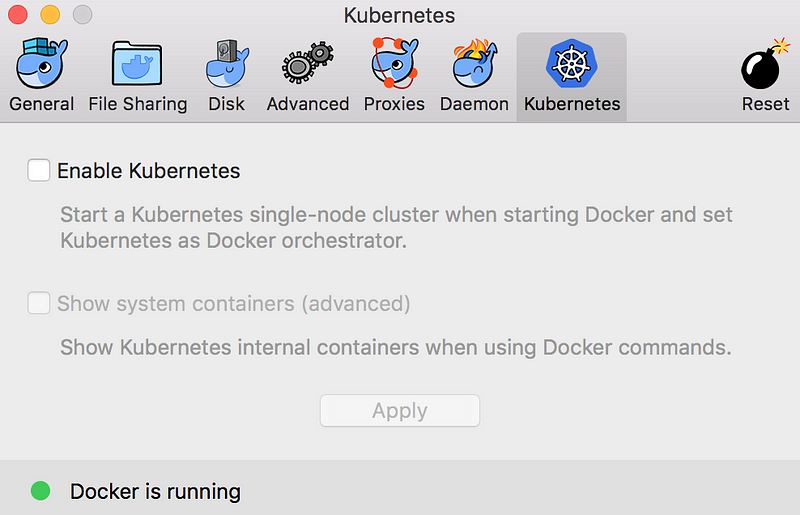
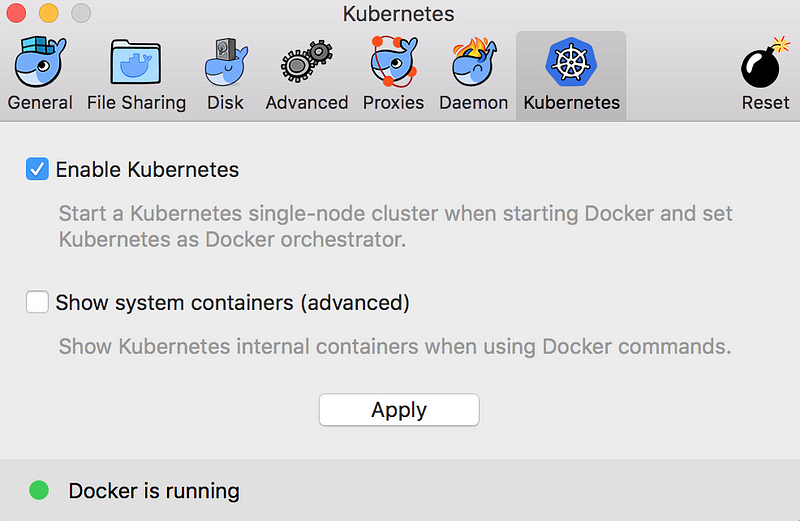
 You will notice that Kubernetes is not enabled. Simply check on the Enable Kubernetes option and then hit the Apply button as shown below:

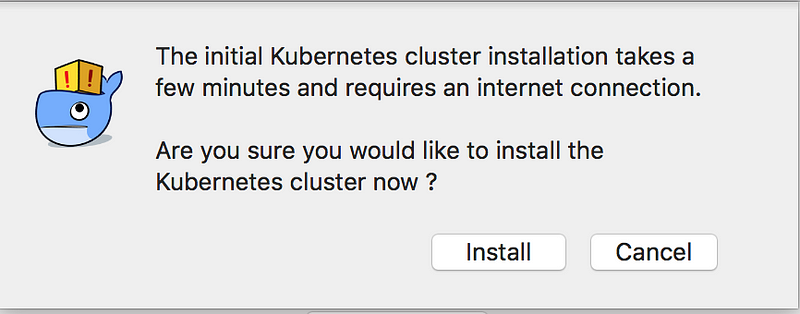
This will display a message that the Kubernetes cluster needs to be installed. Make sure you are connected to the Internet and click on Install
The installation starts. Please be patient since this could take a while depending on your network. It would have been nice to see a small log window that shows a sequence of steps


Finally, you should see the following message:
Click on Close. This will lead you back to the Preferences dialog and you should see the following screen:
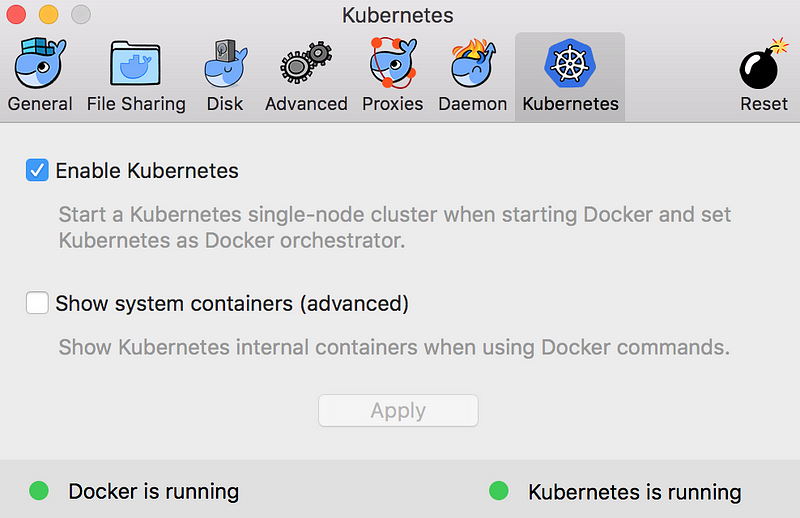
Note the two messages at the bottom of the window mentioning:
  • Docker is running
  • Kubernetes is running
In case you stop running and try to run Docker again, you will notice that both Docker and Kubernetes services are starting as shown below:
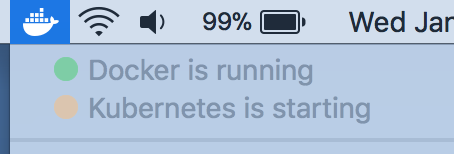
Congratulations! You now have the following:
  • A standalone Kubernetes server and client, as well as Docker CLI integration.
  • The Kubernetes server is a single-node cluster and is not configurable.


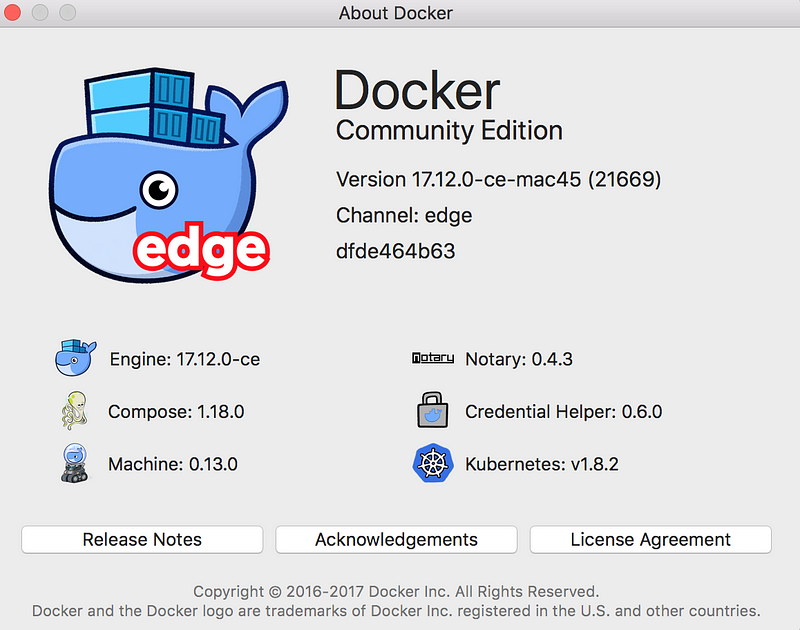
Just FYI … my About Docker shows the following:
Check our installation
Let us try out a few things to ensure that we can make sense of what has got installed. Execute the following commands in a terminal:

$ kubectl version
Client Version: version.Info{Major:”1", Minor:”8", GitVersion:”v1.8.4", GitCommit:”9befc2b8928a9426501d3bf62f72849d5cbcd5a3", GitTreeState:”clean”, BuildDate:”2017–11–20T05:28:34Z”, GoVersion:”go1.8.3", Compiler:”gc”, Platform:”darwin/amd64"}
Server Version: version.Info{Major:”1", Minor:”8", GitVersion:”v1.8.2", GitCommit:”bdaeafa71f6c7c04636251031f93464384d54963", GitTreeState:”clean”, BuildDate:”2017–10–24T19:38:10Z”, GoVersion:”go1.8.3", Compiler:”gc”, Platform:”linux/amd64"}
You might have noticed that my server and client versions are different. I am using kubectl from my gCloud SDK tools and Docker for Mac, when it launched the Kubernetes cluster has been able to set the cluster context for the kubectl utility for you. So if we fire the following command:

$ kubectl config current-context
docker-for-desktop
You can see that the cluster is set to docker-for-desktop.

Tip: In case you switch between different clusters, you can always get back using the following:
$ kubectl config use-context docker-for-desktop
Switched to context “docker-for-desktop”
Let us get some information on the cluster.

$ kubectl cluster-info
Kubernetes master is running at https://localhost:6443
KubeDNS is running at https://localhost:6443/api/v1/namespaces/kube-system/services/kube-dns/proxy
Let us check out the nodes in the cluster:

$ kubectl get nodes
NAME               STATUS  ROLES  AGE VERSION
docker-for-desktop Ready   master 7h  v1.8.2
Installating the Kubernetes Dashboard
The next step that we need to do here is to install the Kubernetes Dashboard. We can use the Kubernetes Dashboard YAML that is available and submit the same to the Kubernetes Master as follows:

$ kubectl create -f https://raw.githubusercontent.com/kubernetes/dashboard/master/src/deploy/recommended/kubernetes-dashboard.yaml
secret “kubernetes-dashboard-certs” created
serviceaccount “kubernetes-dashboard” created
role “kubernetes-dashboard-minimal” created
rolebinding “kubernetes-dashboard-minimal” created
deployment “kubernetes-dashboard” created
service “kubernetes-dashboard” created
The Dashboard application will get deployed as a Pod in the kube-system namespace. We can get a list of all our Pods in that namespace via the following command:

$ kubectl get pods — namespace=kube-system
NAME                                       READY STATUS RESTARTS AGE
etcd-docker-for-desktop                    1/1   Running 0       8h
kube-apiserver-docker-for-desktop          1/1   Running 0       7h
kube-controller-manager-docker-for-desktop 1/1   Running 0       8h
kube-dns-545bc4bfd4-l9tw9                  3/3   Running 0       8h
kube-proxy-w8pq7                           1/1   Running 0       8h
kube-scheduler-docker-for-desktop          1/1   Running 0       7h
kubernetes-dashboard-7798c48646-ctrtl      1/1   Running 0       3m
Ensure that the Pod shown in bold is in Running state. It could take some time to change from ContainerCreating to Running, so be patient.

Once it is in running state, you can setup a forwarding port to that specific Pod. So in our case, we can setup 8443 for the Pod Name as shown below:

$ kubectl port-forward kubernetes-dashboard-7798c48646-ctrtl 8443:8443 — namespace=kube-system
Forwarding from 127.0.0.1:8443 -> 8443
You can now launch a browser and go to https://localhost:8443. You might see some warnings but proceed. You will see the following screen:
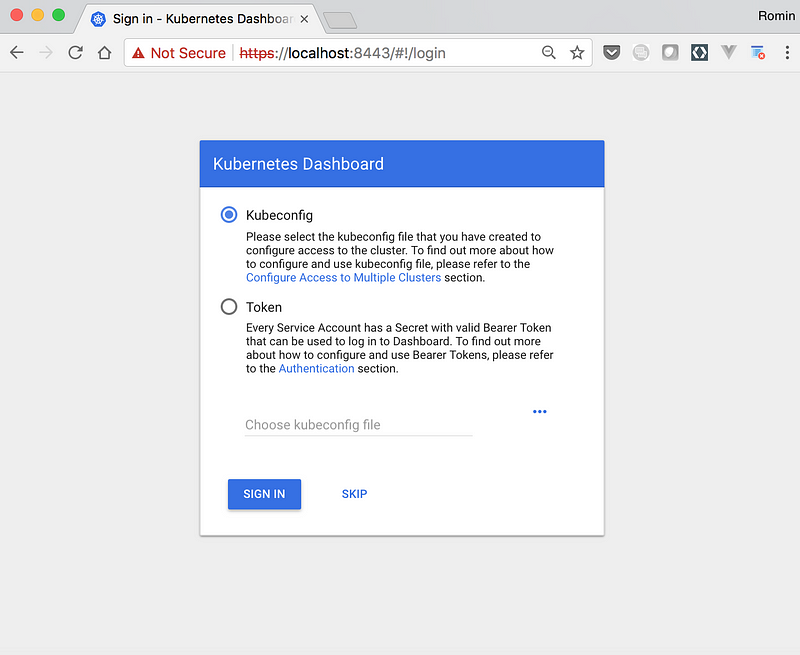
Click on SKIP and you will be lead to the Dashboard as shown below:
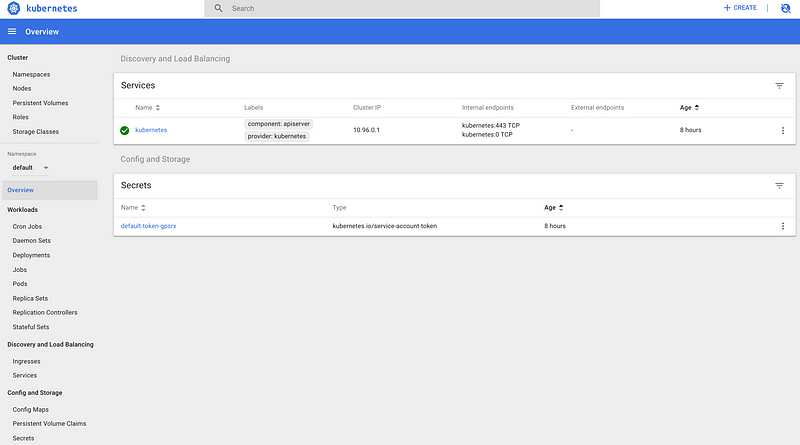

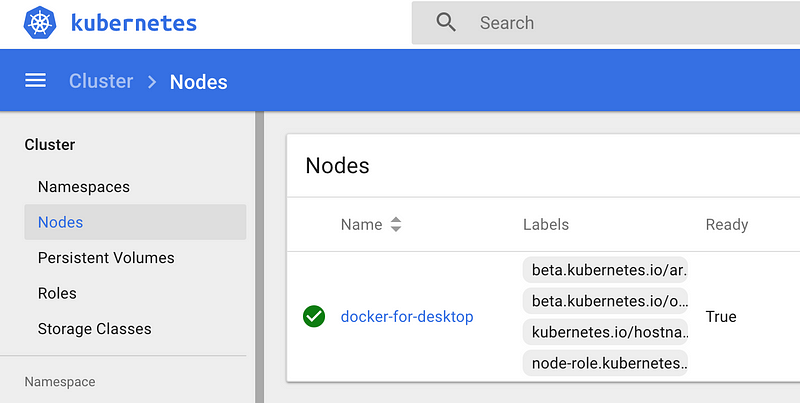
Click on Nodes and you will see the single node as given below:
Running a Workload

Let us proceed now to running a simple Nginx container to see the whole thing in action:
We are going to use the run command as shown below:
$ kubectl run hello-nginx --image=nginx --port=80
deployment “hello-nginx” created
This creates a deployment and we can investigate into the Pod that gets created, which will run the container:
$ kubectl get pods
NAME                         READY STATUS            RESTARTS AGE
hello-nginx-5d47cdc4b7-wxf9b 0/1   ContainerCreating 0        16s
You can see that the STATUS column value is ContainerCreating.
Now, let us go back to the Dashboard and see the Deployments:
You can notice that if we go to the Deployments option, the Deployment is listed and the status is still in progress. You can also notice that the Pods value is 0/1.
If we wait for a while, the Pod will eventually get created and it will ready as the command below shows:
$ kubectl get pods
NAME                         READY STATUS  RESTARTS AGE
hello-nginx-5d47cdc4b7-wxf9b 1/1   Running 0        3m


Docker


If we visit the Replica Sets now, we can see it:


Click on the Replica Set name and it will show the Pod details as given below:


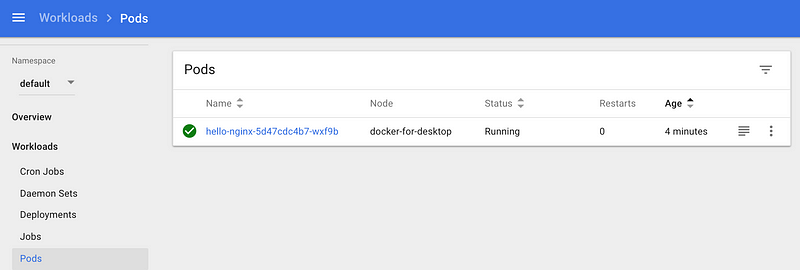
Alternately, you can also get to the Pods via the Pods link in the Workloads as shown below:


Click on the Pod and you can get various details on it as given below:


You can see that it has been given some default labels. You can see its IP address. It is part of the node named docker-for-desktop.


There are some interesting links that you will find on this page as shown below, via which you can directly EXEC into the pods or see the logs too.

We could have got the Node and Pod details via a variety of kubectl describe node/pod commands and we can still do that. An example of that is shown below:
$ kubectl get pods
NAME                         READY STATUS  RESTARTS AGE
hello-nginx-5d47cdc4b7-wxf9b 1/1   Running 0        10m
$ kubectl describe pod hello-nginx-5d47cdc4b7-wxf9b
Name: hello-nginx-5d47cdc4b7-wxf9b
Namespace: default
Node: docker-for-desktop/192.168.65.3
Start Time: Wed, 10 Jan 2018 18:10:35 +0530
Labels: pod-template-hash=1803787063
run=hello-nginx
Annotations: kubernetes.io/created-by={“kind”:”SerializedReference”,”apiVersion”:”v1",”reference”:{“kind”:”ReplicaSet”,”namespace”:”default”,”name”:”hello-nginx-5d47cdc4b7",”uid”:”7415cff7-f603–11e7–9f7b-025000000…
Status: Running
IP: 10.1.0.7
Created By: ReplicaSet/hello-nginx-5d47cdc4b7
Controlled By: ReplicaSet/hello-nginx-5d47cdc4b7
Containers:
hello-nginx:
Container ID: docker://a0c3309b61be4473bf6924ea2be9795de660f49bda36492785f94627690cbdae
Image: nginx
Image ID: docker-pullable://nginx@sha256:285b49d42c703fdf257d1e2422765c4ba9d3e37768d6ea83d7fe2043dad6e63d
Port: 80/TCP
State: Running
...// REST OF THE OUTPUT 

Expose a Service

It is time now to expose our basic Nginx deployment as a service. We can use the command shown below:
$ kubectl get deployments
NAME        DESIRED CURRENT UP-TO-DATE AVAILABLE AGE
hello-nginx 1       1       1          1         19m
$ kubectl expose deployment hello-nginx --type=NodePort
service “hello-nginx” exposed
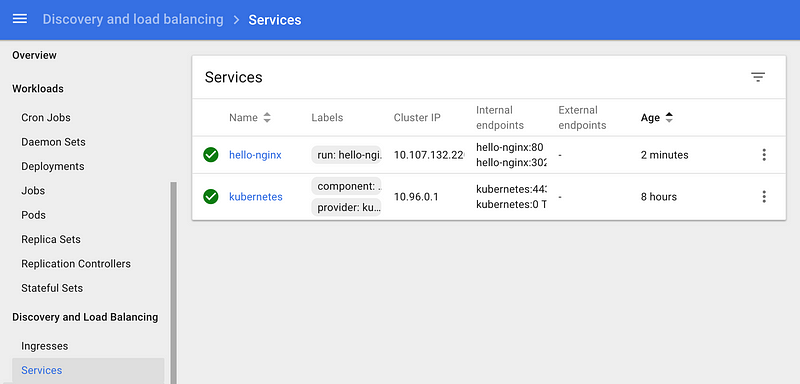
If we visit the Dashboard at this point and go to the Services section, we can see out hello-nginx service entry.

Alternately, we can use kubectl too, to check it out:
$ kubectl get services
NAME        TYPE      CLUSTER-IP     EXTERNAL-IP PORT(S)      AGE
hello-nginx NodePort  10.107.132.220 <none>      80:30259/TCP 1m
kubernetes  ClusterIP 10.96.0.1      <none>      443/TCP      8h
and
$ kubectl describe service hello-nginx
Name: hello-nginx
Namespace: default
Labels: run=hello-nginx
Annotations: <none>
Selector: run=hello-nginx
Type: NodePort
IP: 10.107.132.220
Port: <unset> 80/TCP
TargetPort: 80/TCP
NodePort: <unset> 30259/TCP
Endpoints: 10.1.0.7:80
Session Affinity: None
External Traffic Policy: Cluster
Events: <none>

Scaling the Service

OK, I am not yet done!
When we created the deployment, we did not mention about the number of instances for our service. So we just had one Pod that was provisioned on the single node.
Let us go and see how we can scale this via the scale command. We want to scale it to 3 Pods.
$ kubectl scale --replicas=3 deployment/hello-nginx
deployment "hello-nginx" scaled
We can see the status of the deployment in a while:
$ kubectl get deployment
NAME        DESIRED CURRENT UP-TO-DATE AVAILABLE AGE
hello-nginx 3       3       3          3         45m
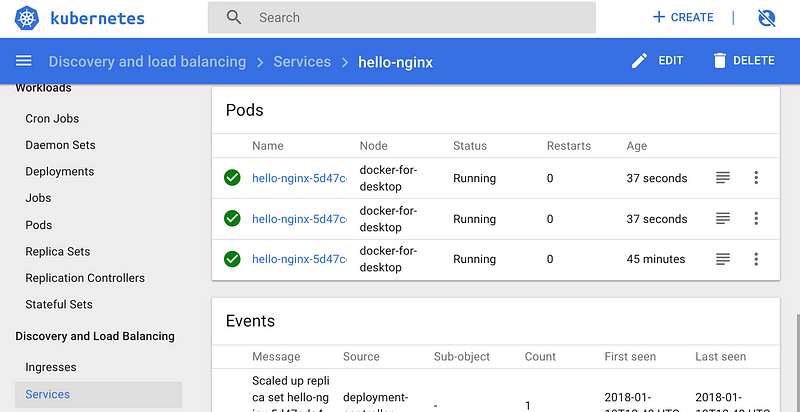
Now, if we visit the Dashboard for our Deployment:
We have the 3/3 Pods available. Similarly, we can see our Service or Pods.

Conclusion

Hope this blog post gets you started with Kubernetes with Docker for Mac. Please let me know about your experience in the comments. Now go forth and play the role of a helmsman.

Wednesday, 24 January 2018

Pipeline as Code in Jenkins

Pipeline: pipeline defination
Agent: mention jenkins label/agent run

Tools: usage of existing jenkins tools from manage jenkins

While the syntax for defining a Pipeline, either in the web UI or with a Jenkinsfile, is the same, it’s generally considered best practice to define the Pipeline in a Jenkinsfile and check that in to source control.

Jenkinsfile (Declarative Pipeline):

pipeline {
    agent any

    stages {
        stage('Build') {
            steps {
                sh 'make'
            }
        }
        stage('Test'){
            steps {
                sh 'make check'
                junit 'reports/**/*.xml'
            }
        }
        stage('Deploy') {
            steps {
                sh 'make publish'
            }
        }
    }
}

Pipeline Terms:

Step: A single task; fundamentally steps tell Jenkins what to do. For example, to execute the shell command make use the sh step: sh 'make'. When a plugin extends the Pipeline DSL, that typically means the plugin has implemented a new step.

Declarative Pipeline:
All valid Declarative Pipelines must be enclosed within a pipeline block, for example:

pipeline {
    /* insert Declarative Pipeline here */
}

The basic statements and expressions which are valid in Declarative Pipeline follow the same rules as Groovy’s syntax with the following exceptions:
  • The top-level of the Pipeline must be a block, specifically: pipeline { }
  • No semicolons as statement separators. Each statement has to be on its own line
  • Blocks must only consist of Sections, Directives, Steps, or assignment statements.
  • A property reference statement is treated as no-argument method invocation. So for example, input is treated as input()

Sections:
Sections in Declarative Pipeline typically contain one or more Directives or Steps

agent
The agent section specifies where the entire Pipeline, or a specific stage, will execute in the Jenkins environment depending on where the agent section is placed. The section must be defined at the top-level inside the pipeline block, but stage-level usage is optional

Parameters
In order to support the wide variety of use-cases Pipeline authors may have, the agent section supports a few different types of parameters. These parameters can be applied at the top-level of the pipeline block, or within each stage directive.
any
Execute the Pipeline, or stage, on any available agent. For example: agent any
none
When applied at the top-level of the pipeline block no global agent will be allocated for the entire Pipeline run and each stage section will need to contain its own agent section. For example: agent none
label
Execute the Pipeline, or stage, on an agent available in the Jenkins environment with the provided label. For example: agent { label 'my-defined-label' }
node
agent { node { label 'labelName' } } behaves the same as agent { label 'labelName' }, but node allows for additional options (such as customWorkspace).

Docker
Execute the Pipeline, or stage, with the given container which will be dynamically provisioned on a node pre-configured to accept Docker-based Pipelines, or on a node matching the optionally defined label parameter. docker also optionally accepts an argsparameter which may contain arguments to pass directly to a docker run invocation, and an alwaysPull option, which will force a docker pull even if the image name is already present. For example: agent { docker 'maven:3-alpine' } or

agent {
    docker {
        image
'maven:3-alpine'
        label
'my-defined-label'
        args 
'-v /tmp:/tmp'
    }
}

dockerfile
Execute the Pipeline, or stage, with a container built from a Dockerfile contained in the source repository.
In order to use this option, the Jenkinsfile must be loaded from either a Multibranch Pipeline, or a "Pipeline from SCM."
Conventionally this is the Dockerfile in the root of the source repository: agent { dockerfile true }.
If building a Dockerfile in another directory, use the dir option: agent { dockerfile { dir 'someSubDir' } }.
You can pass additional arguments to the docker build ...command with the additionalBuildArgs option, like agent { dockerfile { additionalBuildArgs '--build-arg foo=bar' } }

Customworkspac:

agent {
    node {
        label
'my-defined-label'
        customWorkspace
'/some/other/path'
    }
}


reuseNode:
A boolean, false by default. If true, run the container on the node specified at the top-level of the Pipeline, in the same workspace, rather than on a new node entirely

This option is valid for docker and dockerfile, and only has an effect when used on an agent for an individual stage.
Example
Jenkinsfile (Declarative Pipeline)
pipeline {
    agent { docker
'maven:3-alpine' }
    stages {
        stage(
'Example Build') {
            steps {
                sh
'mvn -B clean verify'
            }
        }
    }
}
Execute all the steps defined in this Pipeline within a newly created container of the given name and tag (maven:3-alpine)

Stage-level agent section:
Jenkinsfile (Declarative Pipeline)
pipeline {
    agent none
    stages {
        stage(
'Example Build') {
            agent { docker
'maven:3-alpine' }
            steps {
                echo
'Hello, Maven'
                sh
'mvn --version'
            }
        }
        stage(
'Example Test') {
            agent { docker
'openjdk:8-jre' }
            steps {
                echo
'Hello, JDK'
                sh
'java -version'
            }
        }
    }
}

  • Defining agent none at the top-level of the Pipeline ensures that an Executor will not be assigned unnecessarily.
  • Using agent none also forces each stage section contain its own agent section.
  • Execute the steps in this stage in a newly created container using this image.
  • Execute the steps in this stage in a newly created container using a different image from the previous stage.

Post:
The post section defines actions which will be run at the end of the Pipeline run or stage. A number of post-condition blocks are supported within the post section: alwayschangedfailuresuccessunstable, and aborted. These blocks allow for the execution of steps at the end of the Pipeline run or stage, depending on the status of the Pipeline.

Conditions:
always
Run regardless of the completion status of the Pipeline run.
changed
Only run if the current Pipeline run has a different status from the previously completed Pipeline.
failure
Only run if the current Pipeline has a "failed" status, typically denoted in the web UI with a red indication.
success
Only run if the current Pipeline has a "success" status, typically denoted in the web UI with a blue or green indication.
unstable
Only run if the current Pipeline has an "unstable" status, usually caused by test failures, code violations, etc. Typically denoted in the web UI with a yellow indication.
aborted
Only run if the current Pipeline has an "aborted" status, usually due to the Pipeline being manually aborted. Typically denoted in the web UI with a gray indication

Example:
Jenkinsfile (Declarative Pipeline)
pipeline {
    agent any
    stages {
        stage(
'Example') {
            steps {
                echo
'Hello World'
            }
        }
    }
    post {
        always {
            echo
'I will always say Hello again!'
        }
    }
}

Stages:
Containing a sequence of one or more stage directives, the stages section is where the bulk of the "work" described by a Pipeline will be located. At a minimum it is recommended that stages contain at least one stage directive for each discrete part of the continuous delivery process, such as Build, Test, and Deploy.

Example:
Jenkinsfile (Declarative Pipeline)
pipeline {
    agent any
    stages {
        stage(
'Example') {
            steps {
                echo
'Hello World'
            }
        }
    }
}

Steps:
The steps section defines a series of one or more steps to be executed in a given stage directive

Example:
Jenkinsfile (Declarative Pipeline)
pipeline {
    agent any
    stages {
        stage(
'Example') {
            steps {
                echo
'Hello World'
            }
        }
    }
}

Directives
Environment:
The environment directive specifies a sequence of key-value pairs which will be defined as environment variables for the all steps, or stage-specific steps, depending on where the environment directive is located within the Pipeline.

Example:
Jenkinsfile (Declarative Pipeline)
pipeline {
    agent any
    environment {
        CC =
'clang'
    }
    stages {
        stage(
'Example') {
            environment {
                AN_ACCESS_KEY = credentials(
'my-prefined-secret-text')
            }
            steps {
                sh
'printenv'
            }
        }
    }
}

  • An environment directive used in the top-level pipeline block will apply to all steps within the Pipeline.
  • An environment directive defined within a stage will only apply the given environment variables to steps within the stage.
  • The environment block has a helper method credentials() defined which can be used to access pre-defined Credentials by their identifier in the Jenkins environment.

Options:
The options directive allows configuring Pipeline-specific options from within the Pipeline itself. Pipeline provides a number of these options, such as buildDiscarder, but they may also be provided by plugins, such as timestamps
Available Options:
buildDiscarder
Persist artifacts and console output for the specific number of recent Pipeline runs. For example: options { buildDiscarder(logRotator(numToKeepStr: '1')) }
disableConcurrentBuilds
Disallow concurrent executions of the Pipeline. Can be useful for preventing simultaneous accesses to shared resources, etc. For example: options { disableConcurrentBuilds() }
overrideIndexTriggers
Allows overriding default treatment of branch indexing triggers. If branch indexing triggers are disabled at the multibranch or organization label, options { overrideIndexTriggers(true) } will enable them for this job only. Otherwise, options { overrideIndexTriggers(false) } will disable branch indexing triggers for this job only.
skipDefaultCheckout
Skip checking out code from source control by default in the agent directive. For example: options { skipDefaultCheckout() }
skipStagesAfterUnstable
Skip stages once the build status has gone to UNSTABLE. For example: options { skipStagesAfterUnstable() }
timeout
Set a timeout period for the Pipeline run, after which Jenkins should abort the Pipeline. For example: options { timeout(time: 1, unit: 'HOURS') }
retry
On failure, retry the entire Pipeline the specified number of times. For example: options { retry(3) }
timestamps
Prepend all console output generated by the Pipeline run with the time at which the line was emitted. For example: options { timestamps() }
Example:
Jenkinsfile (Declarative Pipeline)
pipeline {
    agent any
    options {
        timeout(
time: 1, unit: 'HOURS')
    }
    stages {
        stage(
'Example') {
            steps {
                echo
'Hello World'
            }
        }
    }
}
Specifying a global execution timeout of one hour, after which Jenkins will abort the Pipeline run.
Parameters:
The parameters directive provides a list of parameters which a user should provide when triggering the Pipeline. The values for these user-specified parameters are made available to Pipeline steps via the params object, see the Example for its specific usage.

Available Parameters:
  • string
A parameter of a string type, for example: parameters { string(name: 'DEPLOY_ENV', defaultValue: 'staging', description: '') }
  • booleanParam
A boolean parameter, for example: parameters { booleanParam(name: 'DEBUG_BUILD', defaultValue: true, description: '') }
Example:
Jenkinsfile (Declarative Pipeline)
pipeline {
    agent any
    parameters {
        string(
name: 'PERSON', defaultValue: 'Mr Jenkins', description: 'Who should I say hello to?')
    }
    stages {
        stage(
'Example') {
            steps {
                echo
"Hello ${params.PERSON}"
            }
        }
    }
}

Triggers:
The triggers directive defines the automated ways in which the Pipeline should be re-triggered. For Pipelines which are integrated with a source such as GitHub or BitBucket, triggers may not be necessary as webhooks-based integration will likely already be present. Currently the only two available triggers are cron and pollSCM.

Example:
Jenkinsfile (Declarative Pipeline)
pipeline {
    agent any
    triggers {
        cron(
'H 4/* 0 0 1-5')
    }
    stages {
        stage(
'Example') {
            steps {
                echo
'Hello World'
            }
        }
    }
}

Stage:
The stage directive goes in the stages section and should contain a steps section, an optional agent section, or other stage-specific directives. Practically speaking, all of the real work done by a Pipeline will be wrapped in one or more stage directives.
Example:

Jenkinsfile (Declarative Pipeline)
pipeline {
    agent any
    stages {
        stage(
'Example') {
            steps {
                echo
'Hello World'
            }
        }
    }
}

Tools:
A section defining tools to auto-install and put on the PATH. This is ignored if agent none is specified.
Supported Tools
maven
jdk
gradle
Example
Jenkinsfile (Declarative Pipeline)

pipeline {
    agent any
    tools {
        maven
'apache-maven-3.0.1'
    }
    stages {
        stage(
'Example') {
            steps {
                sh
'mvn --version'
            }
        }
    }
}

Ansible: Roles

Use Ansible roles to orchestrate more complex configurations.Let's create a new directory named  nginx , which will be a Role. Then we&...